
We may earn money or products from the companies mentioned in this post.
*in a spooky voice* Hello everyone! Are you ready to have a spooktacular Halloween this year? Are you on a budget, but still want your spooky wreath that looks amazing? Are you reading this in a spooky voice?
*in a regular voice* That was quite fun. Anyway, October and Halloween are just around the corner (this year is going by so fast). If you have a husband and a daughter who LOVES Halloween like mine do, then you will be decorating a little bit early. Not to mention, my husband doesn’t let me decorate for Christmas early (my favorite time of year, but that is not the point). I have searched and searched for ways that could lead me to a fantastic, but spooky wreath and everything I saw was a little bit on the expensive side like the side of the budget that I don’t want to spend.
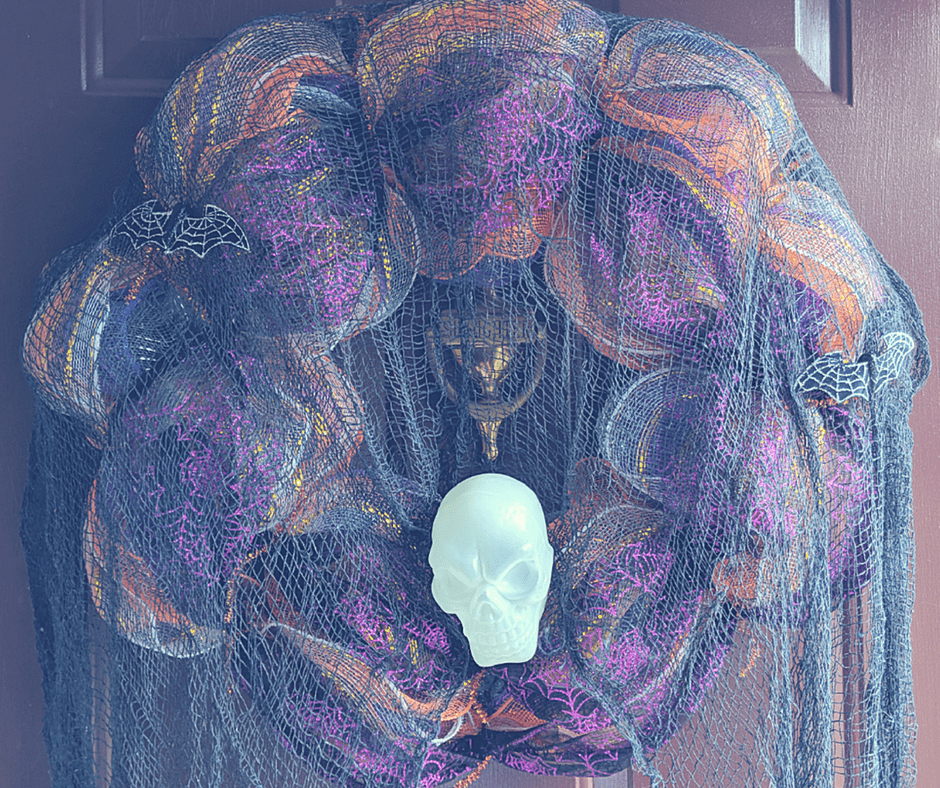
So, with all of that in mind, I did my own thing and my wreath came out looking like it was professionally made and spooky (okay…I am tooting my own horn, but I thing it looks great). All together, my wreath costed me $8 because being a mom and a crafter, I already had two of the things that I needed. Still, that is not a bad price AT ALL when you are on a budget and thankfully I have learned from my mistakes on making wreaths, which I will get into later. If you are wondering, well where did she get all of her decorations? Let me tell you, I got this all at *insert Star Wars revealing music*…the Dollar Tree! Yes, I got all of my stuff at the Dollar Tree and I will also tell you that this place is sometimes the best.
With no further ado, here is how I made my wreath:
DIY Spooky Halloween Wreath
This is what I used:
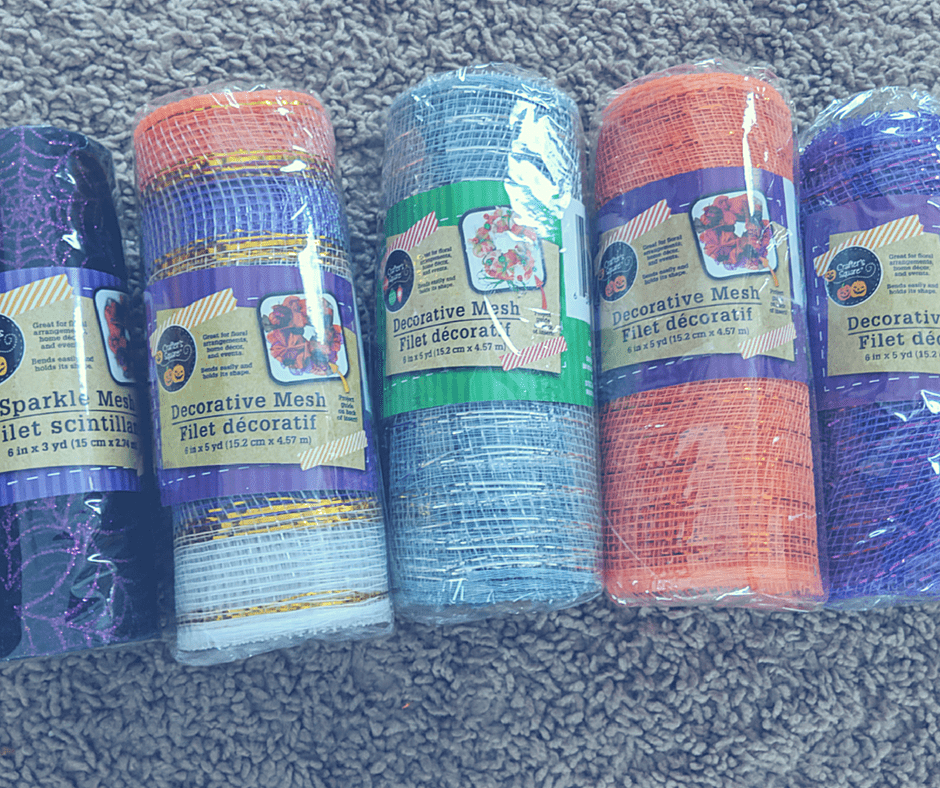
1 small gray mesh
1 small purple mesh
1 small orange mesh
1 small Halloween striped mesh
1 small black with purple spider webs mesh ribbon
about 16 orange pipe cleaners
any size wreath (I used an 18 inch)
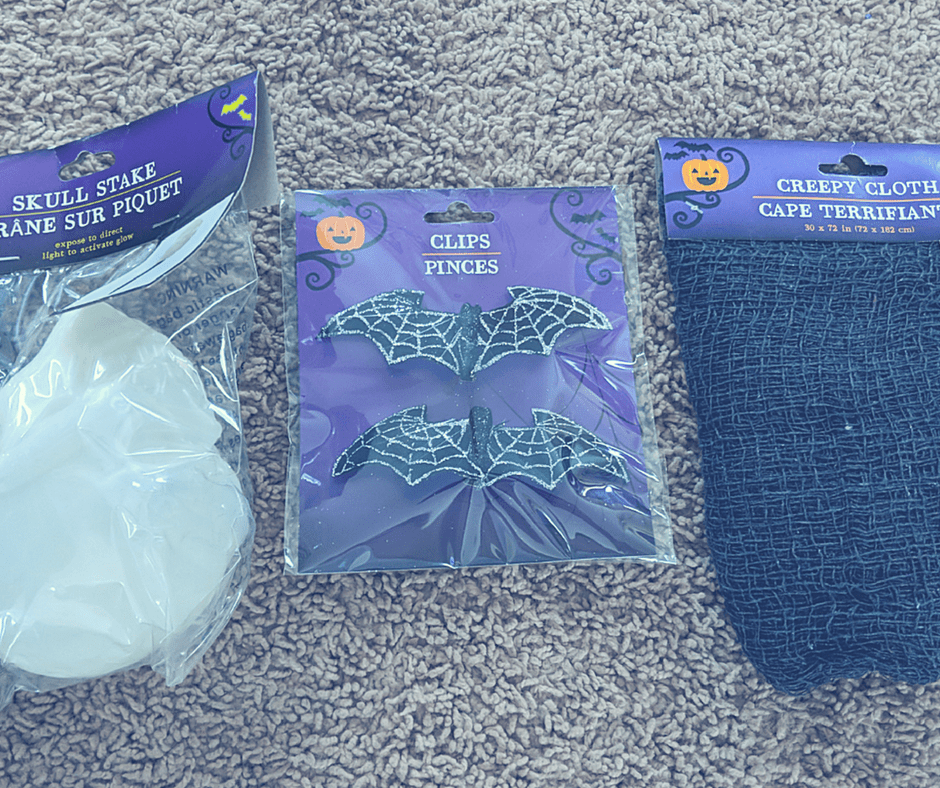
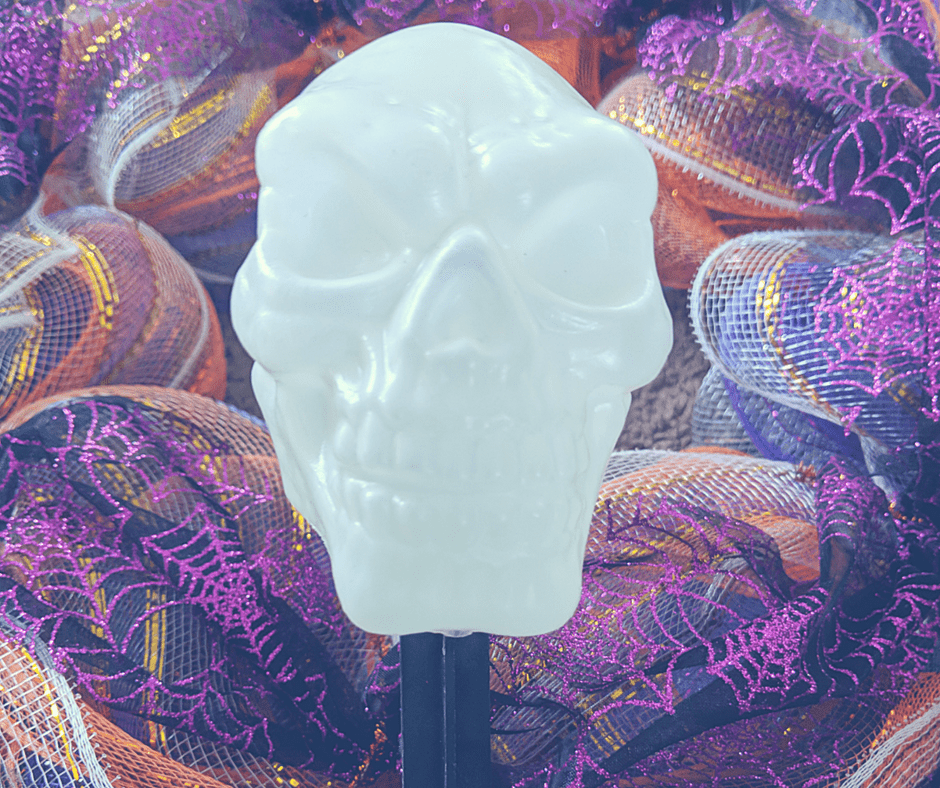
1 light up skull stake
1 pack of clip on bats
1 spooky cloth
Directions:
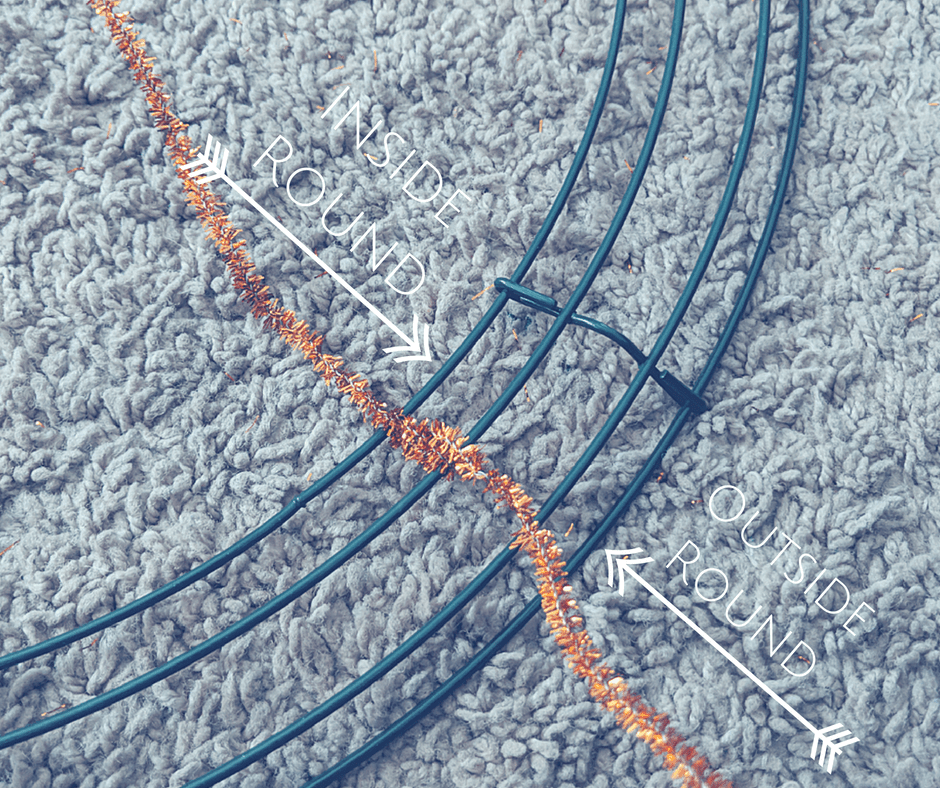
- Start by twisting the pipe cleaners to the wreath. The way I did was that I put 2 pipe cleaners in each section of the wreath. There are 4 rounds in a wreath, so I put 1 pipe cleaner on the two inside rounds and 1 on the two outside rounds.
Repeat this step until you have 2 pipe cleaners in each section.
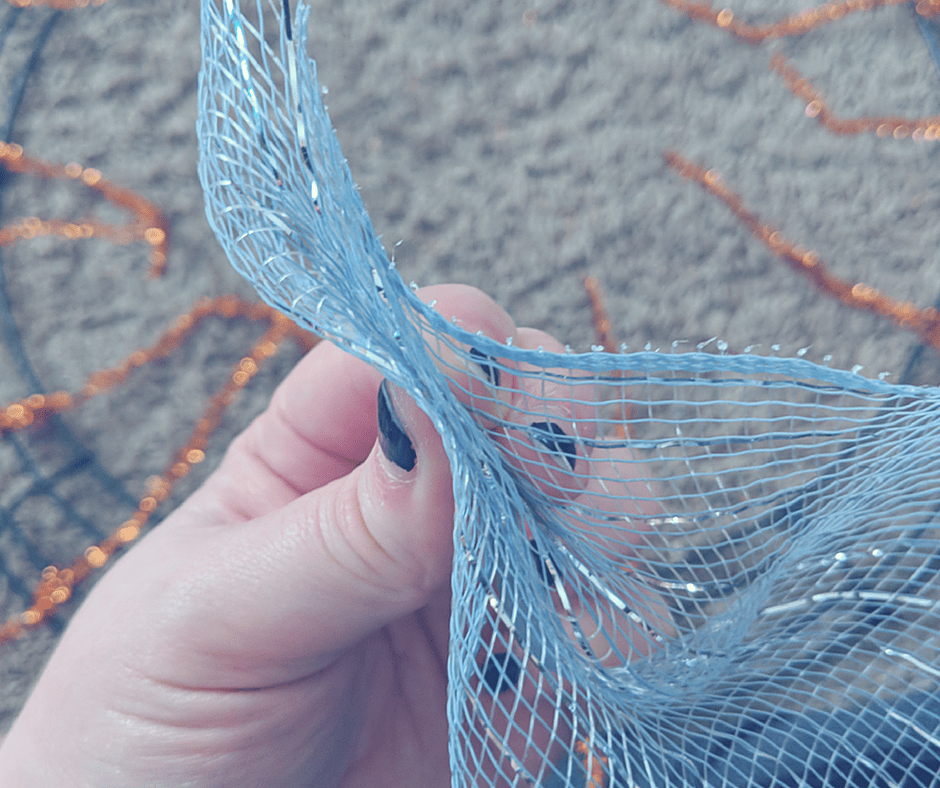
- Now, it’s time to start twisting in the mesh. This is where I made my mistakes in previous versions, but now I got it down packed. You first start off with the end of the mesh and pinch it. Put this starting end into an inside round pipe cleaner.
Then, measure out 8 inches from the pipe cleaner to the new end section of the mesh.
Pinch it, then twist it in the next inside round pipe cleaner.
Repeat this until you have come to where you started, then start twisting the sections of mesh into the outside rounds. Repeat until you have finished your first roll of mesh.
- Keep repeating step 2 until you have finished all of your colored mesh. I did my colors as gray, purple, orange, Halloween striped, and then the black with purple spider web ribbon.
- Finally, it is time to start decorating! First, I put the skull stake together. It is simple and it will charge up from the sun, then glow at night. How cool!
Anyway, then I used the cloth (which is small), and put it around the top of the wreath and let it hang down as it is kind of like a cloak for the skull. Then, clip the bats on where ever you feel like on the cloth.
- BOOM! You are done ladies and gents, you have a spooky, but look amazing wreath! You can decorate it however you like, but I decided to go this route. Now, just let your witch out and like Sarah Jessica Parker in Hocus Pocus, call out for all the little children and let everyone know you are ready for trick or treat! (obviously not to brain wash and devour to stay young)


There you have it my pretties. A cheap and spooky version on how to make a wreath that won’t break your bank. If you any other ideas on decorations, then please let me know in the comments. I would love to see your projects as well. That is all for now. I hope you enjoyed reading. As always, I hope you all have a great weekend and I will see you in the next post!


I LOVE the Dollar Tree! Especially at Halloween. They have so many amazing things! Your wreath is awesome.
They definitely do! Their Christmas section is great too and can’t wait to make a wreath for Christmas! They even had a candy cane shaped wired wreath, but they keep getting sold out of those.